The dreaded and vicious creature, known to cyclists as the Puncture Fairy (PF) has visited me a couple of times before, mainly when I was running skinny tires on a road bike (once a week perhaps). Then I bought better tires and she took offence and visited less. Then when I switched to a Pashley bike and Marathon Plus tires it seems it had taken a hint and flew off back to the fairy land.
It came back though a couple of times to torment my bakfiets. The bakfiets runs on standard Marathon tyres. It's a pretty heavy bike plus it usually carries a decent amount of cargo (30kg of kids + weeks of groceries, an industrial carpet cleaner, 100kg of compost etc.) so the strain on the tires and tubes is considerable. Even when the carcass of the Marathon tire is strong enough to stop the spiky intruder at first it usually lodges itself in the rubber and then is slowly pushed in until it meats the soft and delicate inner tube. This means I usually stop and check the tires after riding through a particularly big patch of broken glass. Other times the weight of the cargo and the bike means that riding into a deep pothole at speed creates enough force to actually puncture the inner tube, and not even the best tire can protect against that.

I will not bore you with the previous punctures I had but will go straight to the one which happened today. It was a slow puncture so I was able to get home and carry out the repair in peace. It was on a rear tire so the chaincase, chain, gear cable and brake cable meant that I was going to simply repair it with tube patches rather than putting a new tube in. At this point the tube had still some air in it, but was definitely unridable.

This is the kit I use for tube repairs. Gloves help to keep your hands clean although you need pretty strong ones - the vinyl ones I use usually get torn around fingertips. On the other hand you don't want them too thick or you might find it difficult to apply the patch or perform other delicate tasks. Two cheap tyre levers - two forks or spoons with flat handles also work if you don't have these. Sanding paper to matt the area of rubber around the puncture, the patches which come in different sizes and shapes (I find the Weldtite patches good, but haven't tried any others yet so my recommendation would be pointless:) and the vulcanizing agent to glue the patches to the tube.
I needed to jack the bakfiets on some wood blocks so that the rear wheel could rotate freely - I had to readjust the blocks a couple of times to make sure the pedals could rotate freely as well, so that I could move the wheel back and forth.
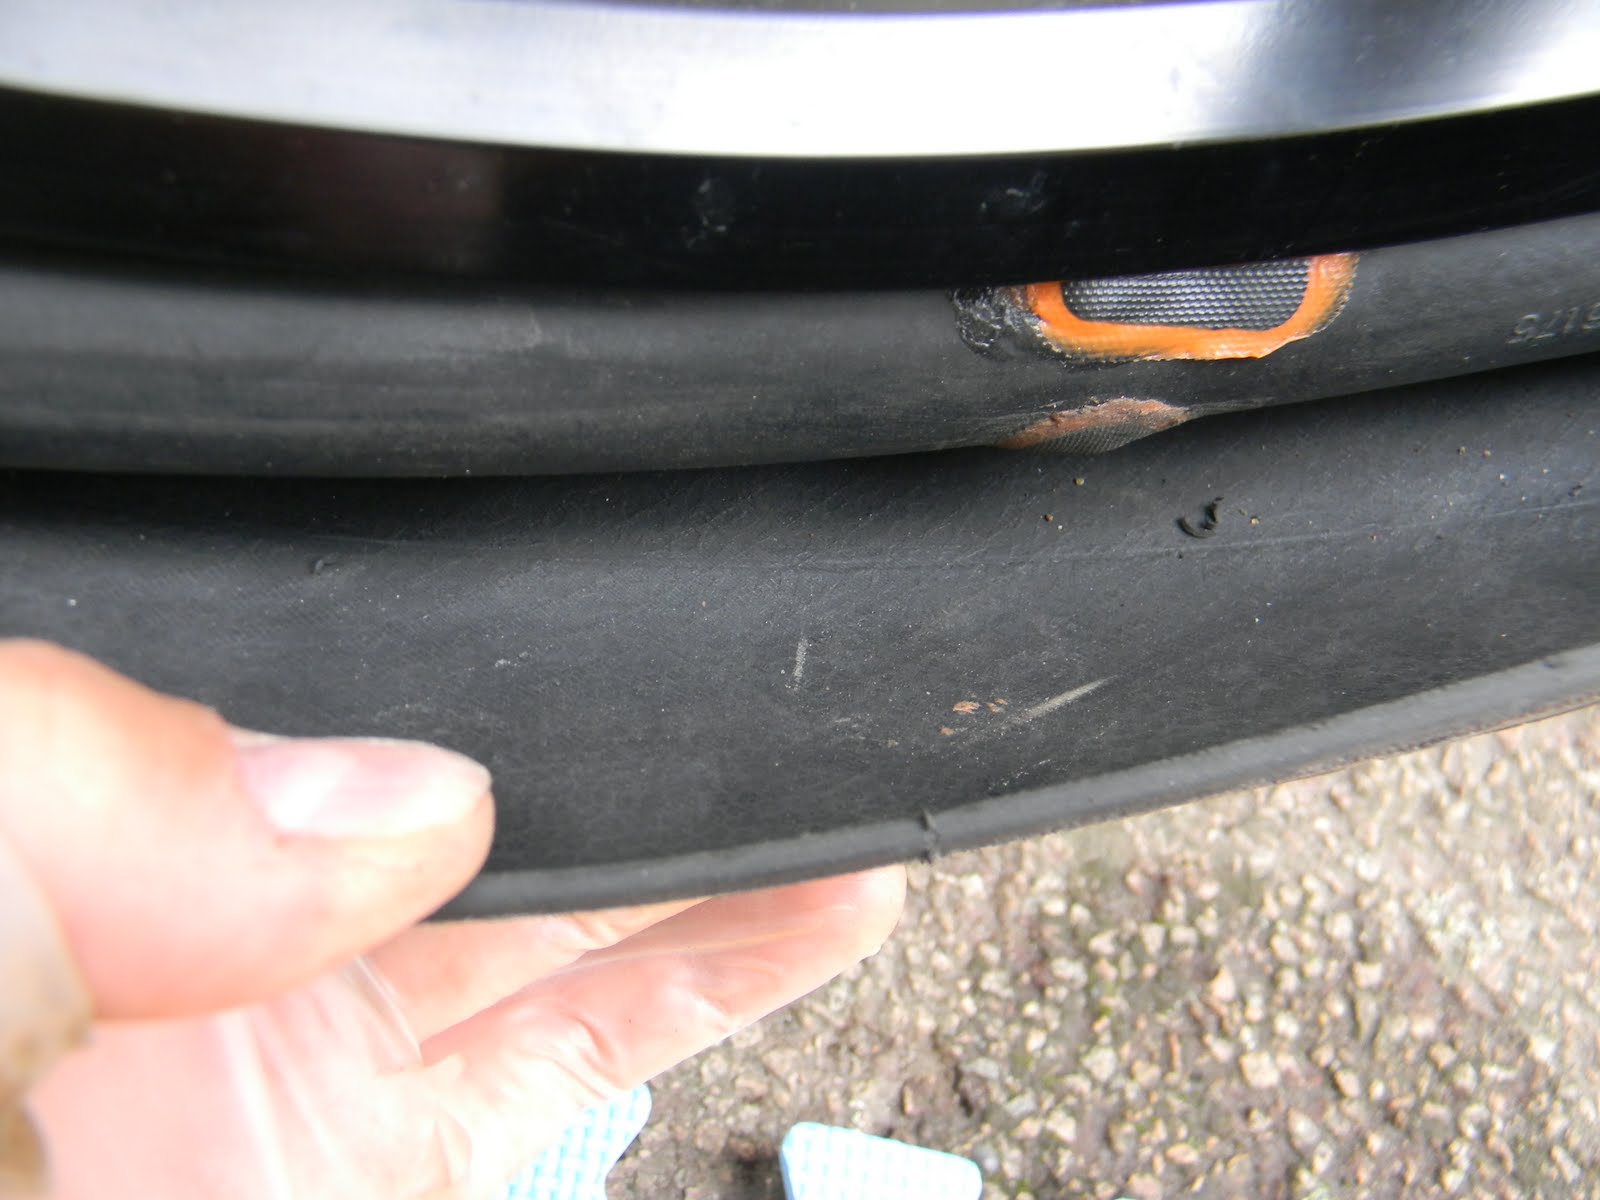
Firstly I removed the tire on the non-drivetrain side. It's a bit of work with the Marathon Tires, but not as hard as putting them back :)
I found the offending shard of glass. My wife's cosmetic tweezers were perfect for getting it out.
Yep, this is the little bugger!
Finding the puncture was a pain as it was small and the wind outside made hearing the hiss of air a bit difficult. I had to use the magic potion.
The famous magic potion - bit of dish washing liquid and water. If you suspect a hole just apply it sparingly on the tube - if you see bubbles you found it!
Next I used the sanding paper to rough the area around the hole. The pros say there are people who rough too little and people who don't rough enough. So Make sure when you do it, you get to the nice fresh rubber underneath sot that the vulcanizing agent can work it's magic.
I applied the vulcanizing agent before actually checking how big the patch is going to be but the more the merrier I guess.
The 60 seconds you have to wait for the agent to start vulcanizing the rubber gives you time to prepare the patch.
Peel the silver layer.
Apply to the tube.
???
Profit
Some patches I put on in the spring still holding well...
Putting the tube back in the rim, I pumped it to make sure the patch holds. Nothing worse then finding it doesn't when you've replaced the tire bead.
Whoops, seems that there's a problem around the old patch. It's probably from the debris in the tire. When I pumped the tube it pressed against the tire and presto and new puncture ready. Remember kids always remove the debris from your tires before putting the tube back!
Once that puncture was fixed as well it was time to replace the tube in the rim (had to remove the valve as well to be able to get to the puncture). Put the nut back on the keep the tube in place.
New big patch and inside clear of debris.
Putting the bead back in. As you can clearly see here - the gloves gave up.
All done.
The tube holds air again.
And that all folks. Took me 10 minutes to fix it, while actually taking pictures. One thing I forgot to check it that the bead on the other side of the rim was in as well so I got a nasty surprise when I tried riding off. No problem - deflated the tire, pushed bead back in, inflated the tire - lesson for me - always check.
I must admit it's been a while since I posted, mainly because there are other bloggers who write about important things better and usually before I think of them. There's been a lot happening lately -
flashrides on Blackfriars Bridge,
Street Talks,
LCC going dutch,
freewheeler taking leave and of course most importantly the
Cycling Embassy of GB launch (as reported by Mark from ibikelondon) - so a lot of good things - the cycling world is gathering momentum it would seem.
Thanks for reading! I am planning to write a post all about the bakfiets - if there's anything that is of particular interest to you - drop me a line.


This takes me back.
ReplyDeleteWhen I started mending my own punctures in the late 60s when I was 9 or 10 I remember my grandpa teaching me this method without the wheel being removed from the bike.
What a faff!
Get the wheel off and do it properly, and quicker.
@pete did I mention that I would have to disconect the roller brake, hub gears, the chain and remove the chaincase? I bet the it would take seconds to change the tube but reconnecting all that stuff would take much more.
ReplyDeleteYes you did. Sorry.
ReplyDeleteMaybe a foam filled tyre, or even a solid one would be better for a cargo bike like yours.
Or I could occasionally fix a puncture :) I am thinking about upgrading to marathon plus - never had a puncture with those.
ReplyDeleteThe brand of patches and glue I use, Rema Tip Top, say to let the glue cure for 5 minutes, before applying patch. I never take the plastic off as it can sometimes pull the patch up with it.
ReplyDelete